
Tile Installation
Shower walls, tub surrounds, accent walls, and feature surfaces — installed with proper substrate prep and lasting results.
What Tile Installation Actually Involves
Most homeowners see the finished tile and assume the complexity is in the pattern or the grout color. In reality, the work that determines whether tile holds up — or cracks, leaks, and comes loose — happens before the first tile is ever set.
For shower walls, that means installing cement backer board over the studs, then applying a liquid waterproofing membrane like Schluter Kerdi or RedGard to every seam, corner, and penetration point. For a tub surround, it means checking that the tub lip is level and shimmed correctly so the first course of tile sits plumb. For an accent wall, it means verifying the drywall is primed and the layout is centered so cut tiles at both edges are the same width.
What We Handle
- Walk-in shower builds (walls and floor)
- Tub surrounds and tub deck tile
- Bathroom accent walls
- Laundry room and mudroom wall tile
- Fireplace surrounds
- Entryway feature walls
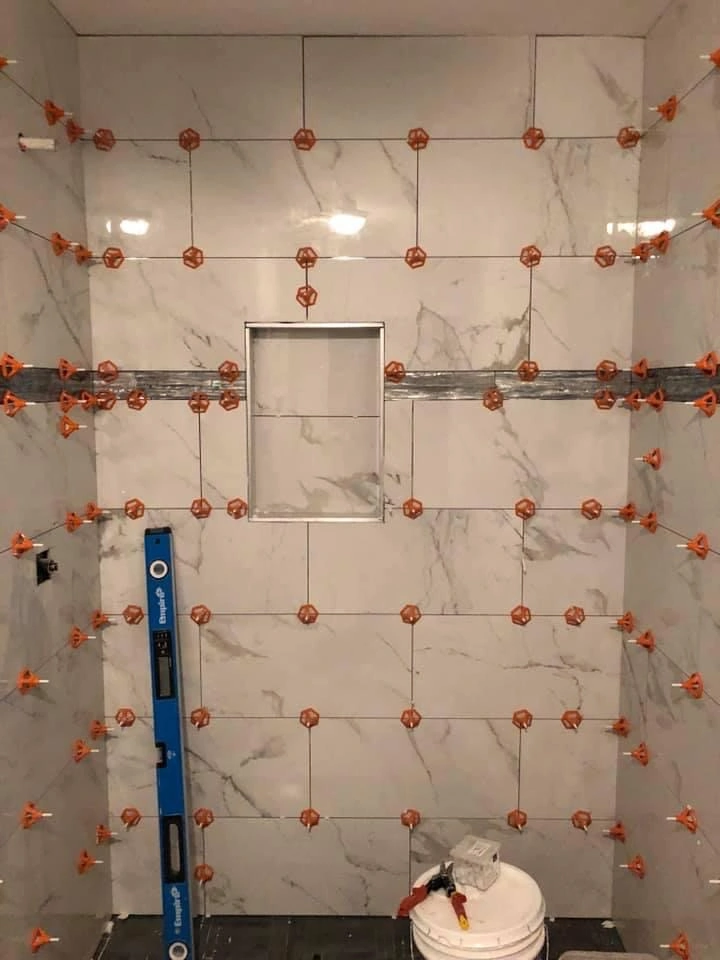
- Niche and alcove tile
Materials We Work With
We set all standard tile types: ceramic, porcelain, natural stone (marble, travertine, slate), glass mosaic, and large-format slabs up to 24x48. Large-format tile requires back-buttering and a notched trowel sized to the tile dimension — using the wrong trowel size is one of the most common installation errors, and it creates hollow spots that cause cracking under load.
Grout selection matters too. Sanded grout for joints over 1/8 inch, unsanded for narrower joints, and epoxy grout where stain resistance is a priority (shower floors, kitchen countertops). We'll walk you through the options before we start.
Service Areas
Tile installation is available throughout Del Paso, Sacramento, and Natomas. We work in older homes that need substrate repair before tile can go down and in newer construction where the prep is already in place.
Our Installation Process
- 01Substrate inspection and prep — cement board, waterproofing, leveling
- 02Layout planning — dry-fit, center lines, cut tile placement
- 03Setting — thinset application, tile placement, leveling clips
- 04Grouting — joint filling, tooling, haze removal, sealing
Common Questions About Tile Installation
Do I need to buy the tile, or do you supply it?
We recommend homeowners purchase tile directly from a tile supplier or home improvement store — you get to choose exactly what you want and see it in person. We'll tell you the square footage needed, including a waste factor (typically 10-15% for straight lays, more for diagonal or herringbone patterns). We supply all setting materials: thinset, grout, backer board, and waterproofing.
What is back-buttering and why does it matter for large tile?
Back-buttering means applying a thin coat of thinset directly to the back of the tile in addition to the troweled thinset on the substrate. For tiles 12 inches or larger, this ensures full contact between tile and mortar — industry standards require 95% coverage in wet areas. Without it, hollow spots form and the tile eventually cracks or debonds under foot traffic or thermal movement.
Can you tile over existing tile?
Sometimes, but we're cautious about it. Tiling over existing tile works if: the existing tile is fully bonded (no hollow spots), the surface is flat, and the added height won't create problems at thresholds or fixtures. We check all of these before committing. If the existing tile is loose in any area, we prefer to demo and start fresh — a properly bonded surface is worth the extra day of work.
Ready to talk about your tile project? Call us at (916) 313-2437 or send us a message for a written estimate.